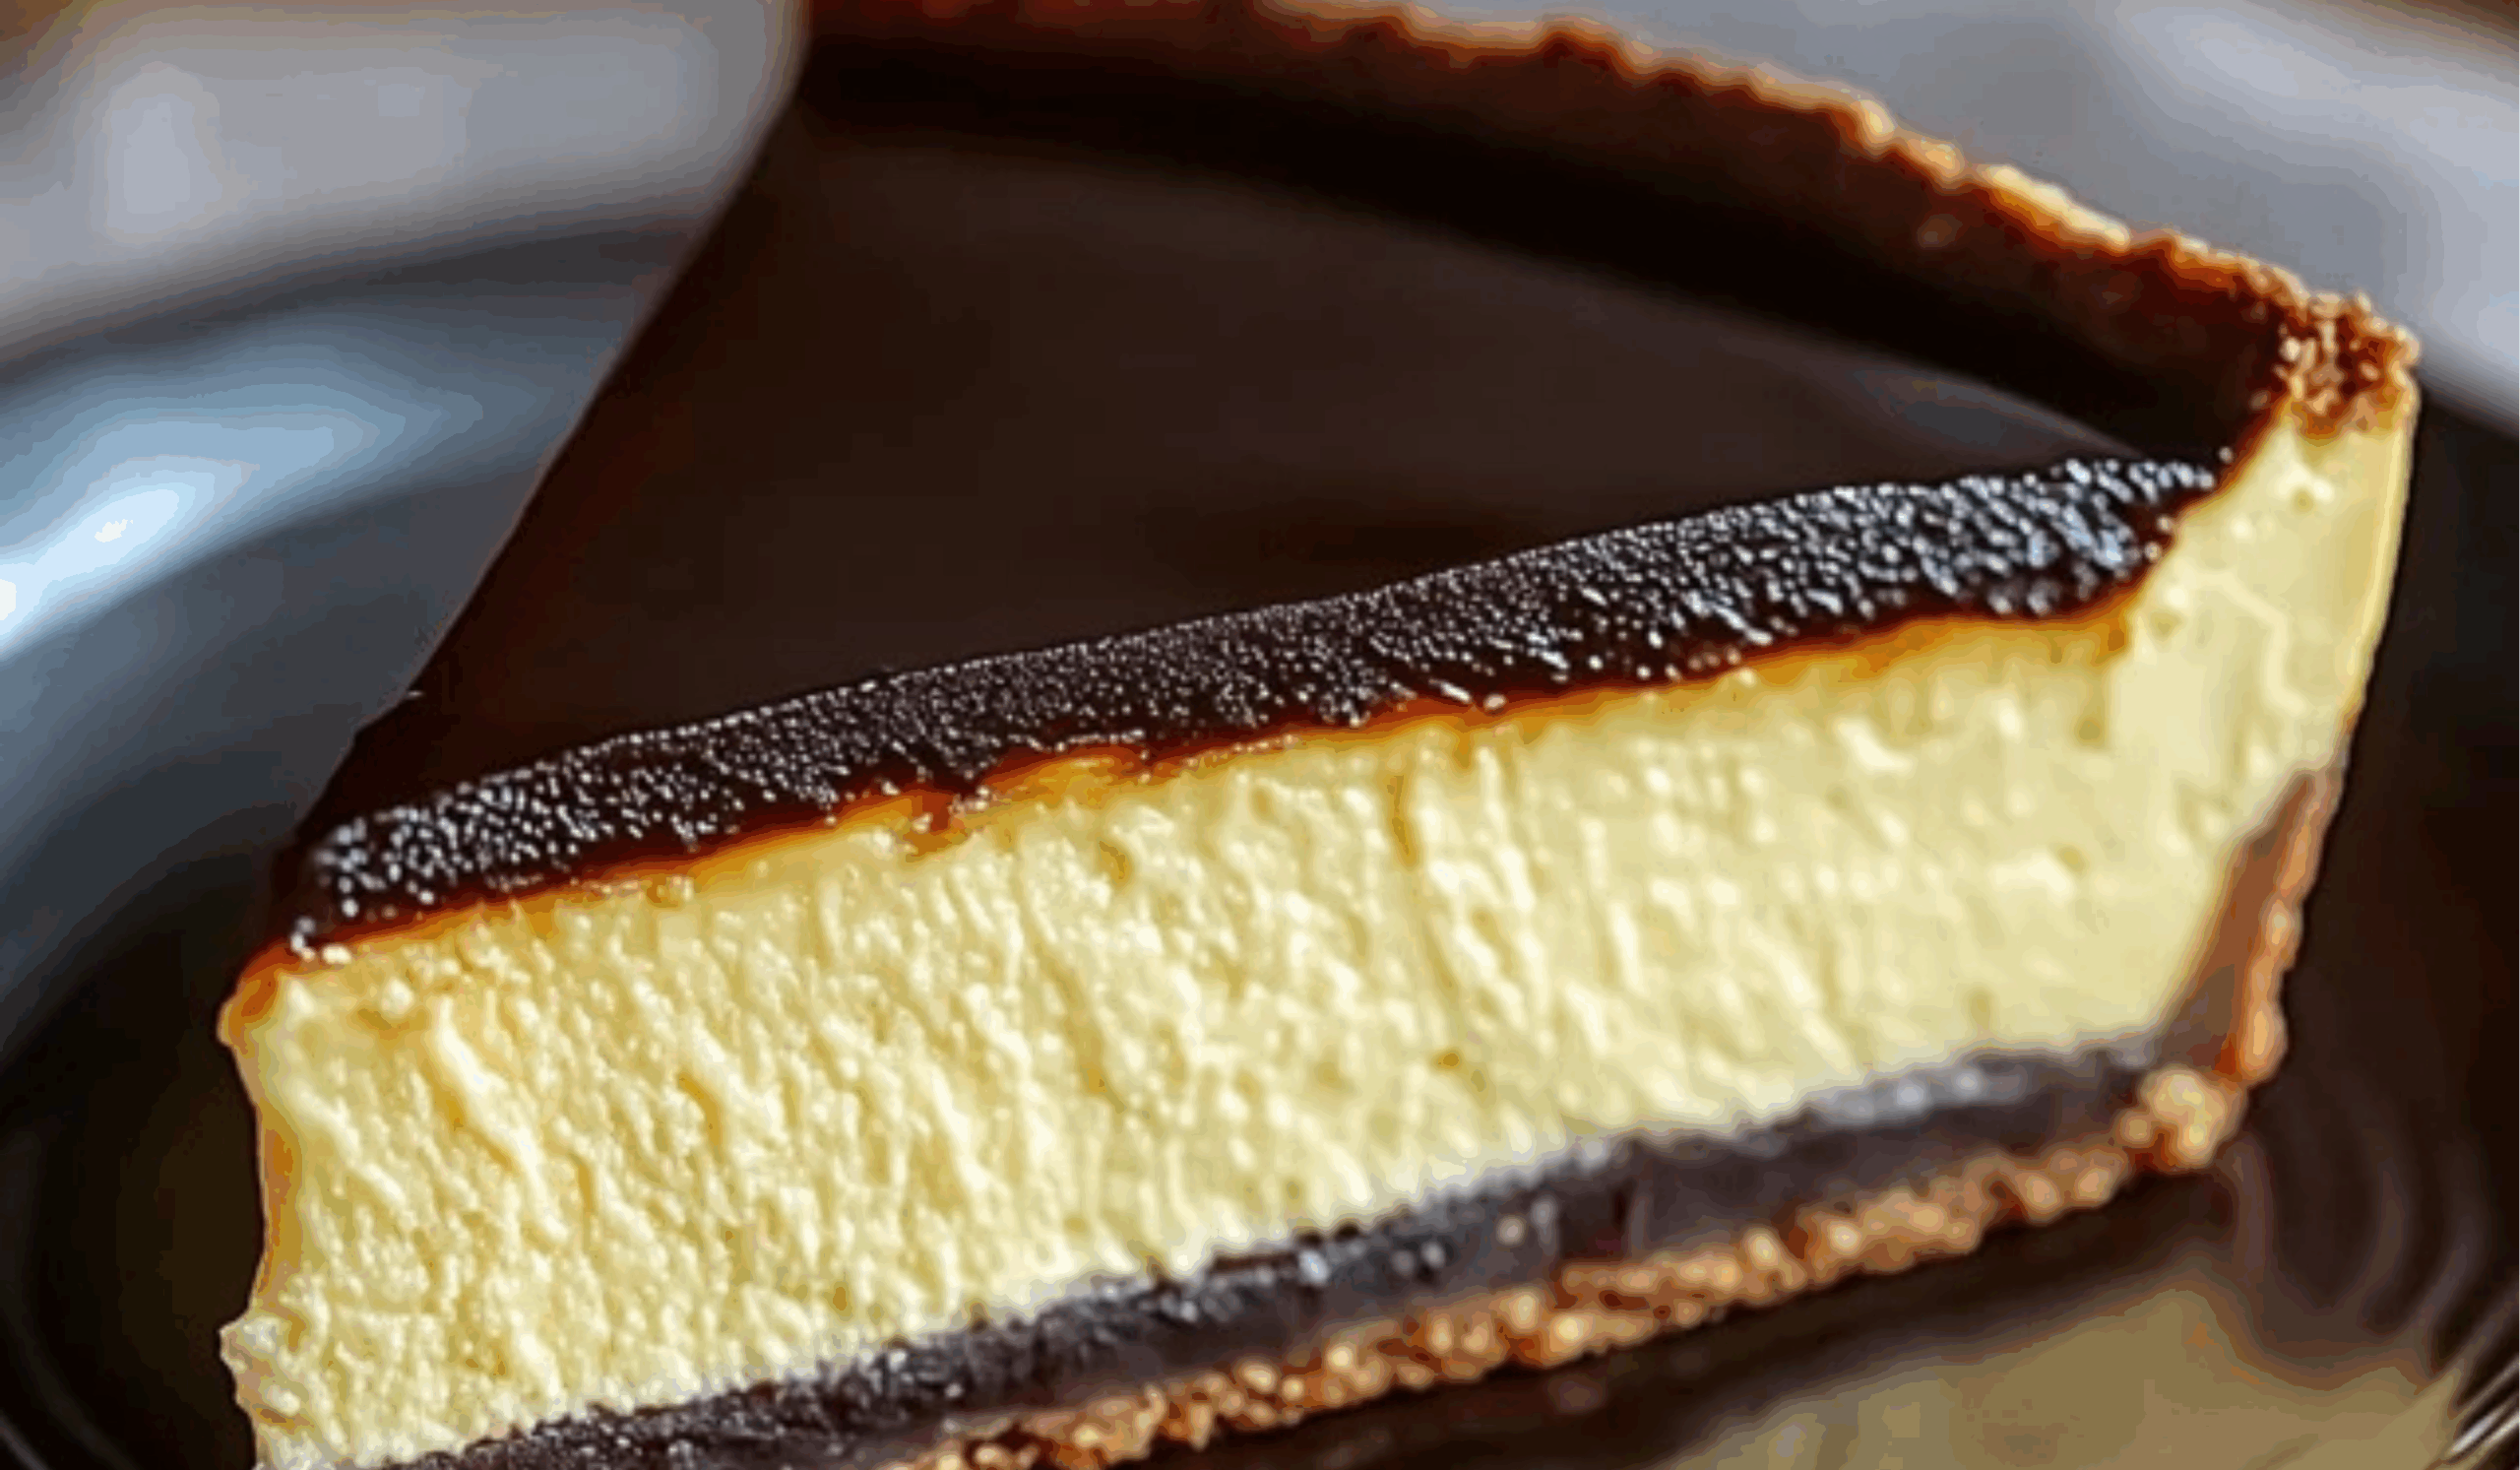
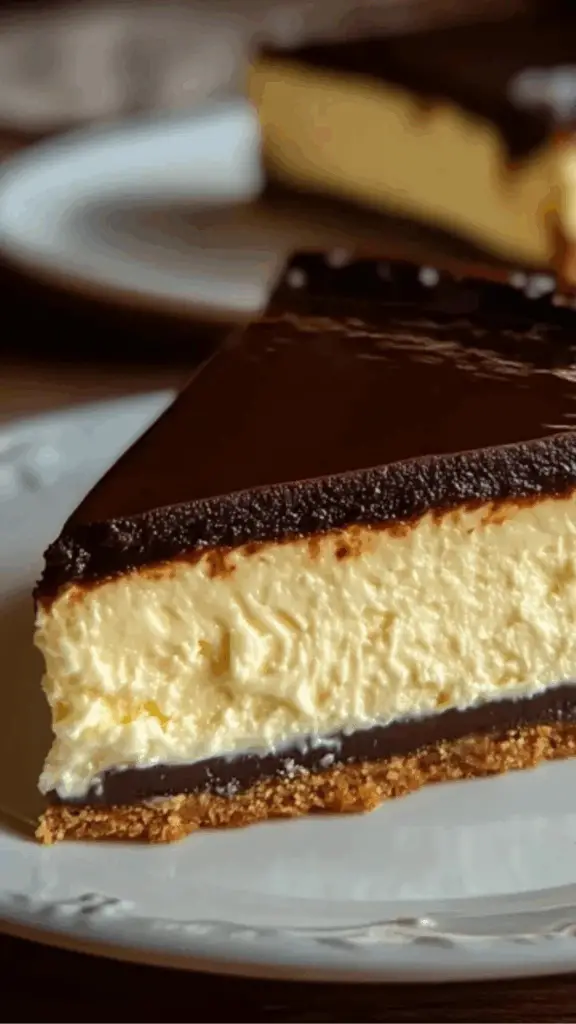
The first time I tasted a Boston Cream Pie Cheesecake was at a small potluck where everyone was asked to bring a dessert. A friend showed up with this glossy, chocolate-topped creation that looked like something out of a bakery window. I assumed it was complicated and best left to professionals. But later, I learned the beauty of this dessert: it’s an elegant fusion of two beloved treats—the dense richness of cheesecake and the custardy, chocolate-laced charm of Boston cream pie. What’s more, it’s completely doable at home, even for beginners.
Print
Boston Cream Pie Cheesecake: A Beginner’s Guide to a Classic Twist
Craving something rich, creamy, and classic with a twist? 🍰🍫 This Boston Cream Pie Cheesecake is the dreamy mashup you didn’t know you needed — and it’s beginner-friendly! 🌟💛 A buttery crust, silky vanilla cheesecake, luscious custard, and a glossy chocolate ganache topping… pure dessert bliss! 🍮🎉 Easy to follow and impossible to resist, it’s perfect for parties or sweet cravings. One slice and you’ll be hooked! 🏡✨ Bake it, chill it, devour it! 😍
- Total Time: 90 minutes
- Yield: 12 servings (12 slices) 1x
Ingredients
For the crust:
- 2 cups graham cracker crumbs (or digestive biscuits if graham crackers aren’t available)
- ½ cup unsalted butter, melted
- ½ cup dark chocolate, melted (semi-sweet or milk chocolate also works)
For the cheesecake filling:
- 3 cups cream cheese, softened (full-fat cream cheese works best, but reduced-fat is okay)
- 1 cup granulated sugar
- 3 large eggs
- 2 teaspoons vanilla extract
- ½ cup sour cream (can substitute with Greek yogurt)
- ½ cup heavy cream (can use whipping cream if needed)
For the chocolate ganache topping:
- 1 ½ cups dark chocolate chips (bittersweet or semi-sweet)
- ½ cup heavy cream
Tools:
- 9-inch springform pan
- Electric mixer or hand mixer
- Mixing bowls
- Rubber spatula
- Saucepan for ganache
- Oven
Instructions
1. Prepare the oven and pan.
Preheat your oven to 325°F (165°C). Grease a 9-inch springform pan with butter or non-stick spray. You can also line the bottom with parchment paper for easier removal.
2. Make the crust.
In a bowl, combine graham cracker crumbs and melted butter until the mixture resembles wet sand. Press this firmly into the bottom of your pan using the bottom of a glass or a spatula. Pour the melted dark chocolate over the crust and spread it evenly. Place the pan in the refrigerator for 10 minutes to set the chocolate layer.
3. Mix the filling.
In a large mixing bowl, beat the softened cream cheese and granulated sugar until smooth and creamy, about 2–3 minutes. Add the eggs one at a time, beating well after each addition. Stir in the vanilla extract, sour cream, and heavy cream until the batter is well combined and silky.
4. Bake the cheesecake.
Pour the batter over the crust and smooth the top with a spatula. Bake for 55–65 minutes. The center should be just set and still slightly jiggly in the middle—like Jell-O.
5. Cool gradually.
Turn off the oven and crack the door open slightly. Leave the cheesecake inside for 1 hour to cool slowly. This helps prevent cracking.
6. Make the ganache.
In a small saucepan, heat the heavy cream until it begins to simmer (don’t let it boil). Pour it over the chocolate chips in a heatproof bowl. Let it sit for 2 minutes, then stir until smooth and glossy.
7. Assemble and chill.
Once the cheesecake is completely cool, pour the ganache over the top and spread it gently with a spatula. Refrigerate for at least 4 hours—or overnight—to let everything set beautifully.
8. Slice and serve.
When ready to serve, run a knife around the edge of the pan before unlocking the springform. Slice with a warm, clean knife for the neatest pieces.
Notes
Don’t overmix the batter. Overbeating can incorporate too much air, leading to cracks. Mix just until combined.
Use room-temperature ingredients. Cold cream cheese and eggs can make the batter lumpy. Let them sit out for about 30 minutes before using.
Bake in a water bath if you’re confident. While optional for beginners, placing your cheesecake in a larger pan filled with hot water while baking can help it cook more evenly and avoid cracks. Just make sure the springform pan is wrapped tightly in foil to prevent leaks.
No springform pan? You can use a regular 9-inch round cake pan, but you’ll need to line it well and serve the cheesecake directly from the pan.
Test for doneness with a gentle jiggle. If only the center jiggles slightly, it’s done. Overbaking can lead to a dry texture.
Ganache too thick? Add a splash of warm cream and stir to loosen it up.
- Prep Time: 25 minutes
- Cook Time: 65 minutes
This recipe has since become my go-to for birthdays and celebrations, especially when I want to impress without spending days in the kitchen. It’s perfect for new bakers because it’s forgiving, has simple ingredients, and offers opportunities to practice foundational baking skills like making a crust, blending a filling, and working with ganache. Whether you’re just getting started or looking to build confidence in the kitchen, this Boston Cream Pie Cheesecake will set you up for success—and lots of compliments.
Ingredients and Preparation
Here’s what you’ll need to get started. All ingredients are widely available, and I’ve included alternatives in case you need to substitute.
For the crust:
- 2 cups graham cracker crumbs (or digestive biscuits if graham crackers aren’t available)
- ½ cup unsalted butter, melted
- ½ cup dark chocolate, melted (semi-sweet or milk chocolate also works)
For the cheesecake filling:
- 3 cups cream cheese, softened (full-fat cream cheese works best, but reduced-fat is okay)
- 1 cup granulated sugar
- 3 large eggs
- 2 teaspoons vanilla extract
- ½ cup sour cream (can substitute with Greek yogurt)
- ½ cup heavy cream (can use whipping cream if needed)
For the chocolate ganache topping:
- 1 ½ cups dark chocolate chips (bittersweet or semi-sweet)
- ½ cup heavy cream
Tools:
- 9-inch springform pan
- Electric mixer or hand mixer
- Mixing bowls
- Rubber spatula
- Saucepan for ganache
- Oven
Step-by-Step Instructions
Follow these steps carefully, and don’t worry if things aren’t perfect. Cheesecake is more forgiving than you think.
1. Prepare the oven and pan.
Preheat your oven to 325°F (165°C). Grease a 9-inch springform pan with butter or non-stick spray. You can also line the bottom with parchment paper for easier removal.
2. Make the crust.
In a bowl, combine graham cracker crumbs and melted butter until the mixture resembles wet sand. Press this firmly into the bottom of your pan using the bottom of a glass or a spatula. Pour the melted dark chocolate over the crust and spread it evenly. Place the pan in the refrigerator for 10 minutes to set the chocolate layer.
3. Mix the filling.
In a large mixing bowl, beat the softened cream cheese and granulated sugar until smooth and creamy, about 2–3 minutes. Add the eggs one at a time, beating well after each addition. Stir in the vanilla extract, sour cream, and heavy cream until the batter is well combined and silky.
4. Bake the cheesecake.
Pour the batter over the crust and smooth the top with a spatula. Bake for 55–65 minutes. The center should be just set and still slightly jiggly in the middle—like Jell-O.
5. Cool gradually.
Turn off the oven and crack the door open slightly. Leave the cheesecake inside for 1 hour to cool slowly. This helps prevent cracking.
6. Make the ganache.
In a small saucepan, heat the heavy cream until it begins to simmer (don’t let it boil). Pour it over the chocolate chips in a heatproof bowl. Let it sit for 2 minutes, then stir until smooth and glossy.
7. Assemble and chill.
Once the cheesecake is completely cool, pour the ganache over the top and spread it gently with a spatula. Refrigerate for at least 4 hours—or overnight—to let everything set beautifully.
8. Slice and serve.
When ready to serve, run a knife around the edge of the pan before unlocking the springform. Slice with a warm, clean knife for the neatest pieces.
Beginner Tips and Notes
Don’t overmix the batter. Overbeating can incorporate too much air, leading to cracks. Mix just until combined.
Use room-temperature ingredients. Cold cream cheese and eggs can make the batter lumpy. Let them sit out for about 30 minutes before using.
Bake in a water bath if you’re confident. While optional for beginners, placing your cheesecake in a larger pan filled with hot water while baking can help it cook more evenly and avoid cracks. Just make sure the springform pan is wrapped tightly in foil to prevent leaks.
No springform pan? You can use a regular 9-inch round cake pan, but you’ll need to line it well and serve the cheesecake directly from the pan.
Test for doneness with a gentle jiggle. If only the center jiggles slightly, it’s done. Overbaking can lead to a dry texture.
Ganache too thick? Add a splash of warm cream and stir to loosen it up.
Serving Suggestions
This cheesecake is rich and indulgent, so it pairs well with light sides or toppings.
Add fresh berries. Raspberries, strawberries, or blueberries provide a tart contrast to the rich chocolate and cream cheese.
Serve with whipped cream. A dollop on the side gives it a classic diner feel.
Light beverages work best. Serve with black coffee, green tea, or even a lightly sweetened iced herbal tea.
For special occasions. Add birthday candles or edible gold dust for a festive touch.
Leftovers? Store slices in an airtight container in the refrigerator for up to 5 days. You can also freeze individual slices for up to 2 months. Thaw in the fridge overnight before serving.
Engagement Features
Baking your first cheesecake can be a proud moment—and this one is sure to become a favorite. If you give it a try, I’d love to hear how it turns out. Did you make any ingredient swaps? Did your ganache swirl perfectly, or did it drip a little over the sides (which is just as beautiful)?
This recipe is a great starting point for experimenting. Try adding a layer of vanilla pastry cream under the ganache if you want to push the Boston Cream Pie influence even further. Or swap the crust for crushed Oreos if you love a chocolate overload.
Baking doesn’t have to be intimidating. With the right instructions, a bit of patience, and a whole lot of enthusiasm, you can absolutely master impressive desserts like this one. So grab your mixing bowl, preheat the oven, and let’s turn your kitchen into your new favorite bakery.
If you enjoyed this recipe or have questions, share your thoughts and results. Every baker starts somewhere—this could be your delicious beginning.