The first time I made a Banana Split Dessert, I was a college student with barely any experience in the kitchen. My friends had planned a potluck dinner, and I volunteered to bring a dessert. I spent hours scrolling through complicated recipes, feeling more and more overwhelmed. Then I stumbled upon a Banana Split Dessert — simple, colorful, and absolutely perfect for a beginner. I decided to give it a shot, and it was a hit. People were asking for seconds, and some even thought I had bought it from a bakery. That night taught me that cooking could be both easy and impressive.
Print
Banana Split Dessert: A Beginner’s Sweet Masterpiece
Banana Split Dessert 🍌🍓 — a sweet, colorful masterpiece that’s as fun to make as it is to eat! 🎨 Layers of creamy goodness, fresh fruits, and a touch of chocolate magic make this beginner-friendly treat an instant crowd-pleaser. 🍫🍒 Perfect for parties, summer days, or anytime you need a cheerful pick-me-up. ☀️✨ No stress, just sweet success!
- Total Time: 20 minutes
- Yield: 12 servings 1x
Ingredients
- 2 cups graham cracker crumbs (or digestive biscuit crumbs as an alternative)
- 1/2 cup unsalted butter, melted
- 1 cup cream cheese, softened
- 1 cup powdered sugar
- 1 and 1/2 cups whipped topping (such as whipped cream or non-dairy alternative)
- 4 ripe bananas
- 1 can (20 ounces) crushed pineapple, drained
- 2 cups strawberries, sliced (or substitute with raspberries if preferred)
- 1 cup chopped fresh or canned peaches (optional alternative to pineapple)
- 1/2 cup chocolate syrup
- 1/4 cup chopped walnuts (optional, or substitute with almonds or pecans)
- Additional whipped topping for garnish
- Maraschino cherries for topping
Instructions
Step 1: Make the Crust
In a medium bowl, combine the graham cracker crumbs and melted butter. Mix until the crumbs are fully moistened. Press the mixture firmly into the bottom of the prepared dish to form an even crust layer. Chill in the refrigerator for about 10 minutes to set while you prepare the next layers.
Beginner Note: Press firmly but gently; a flat-bottomed glass can help you create an even, compact crust without cracks.
Step 2: Prepare the Cream Cheese Layer
In a large bowl, beat the softened cream cheese and powdered sugar together until smooth and creamy. Fold in the whipped topping gently to maintain a light texture. Spread this mixture evenly over the chilled crust.
Beginner Note: Use slow, sweeping motions when folding whipped topping into the cream cheese to keep it airy and prevent deflating the mix.
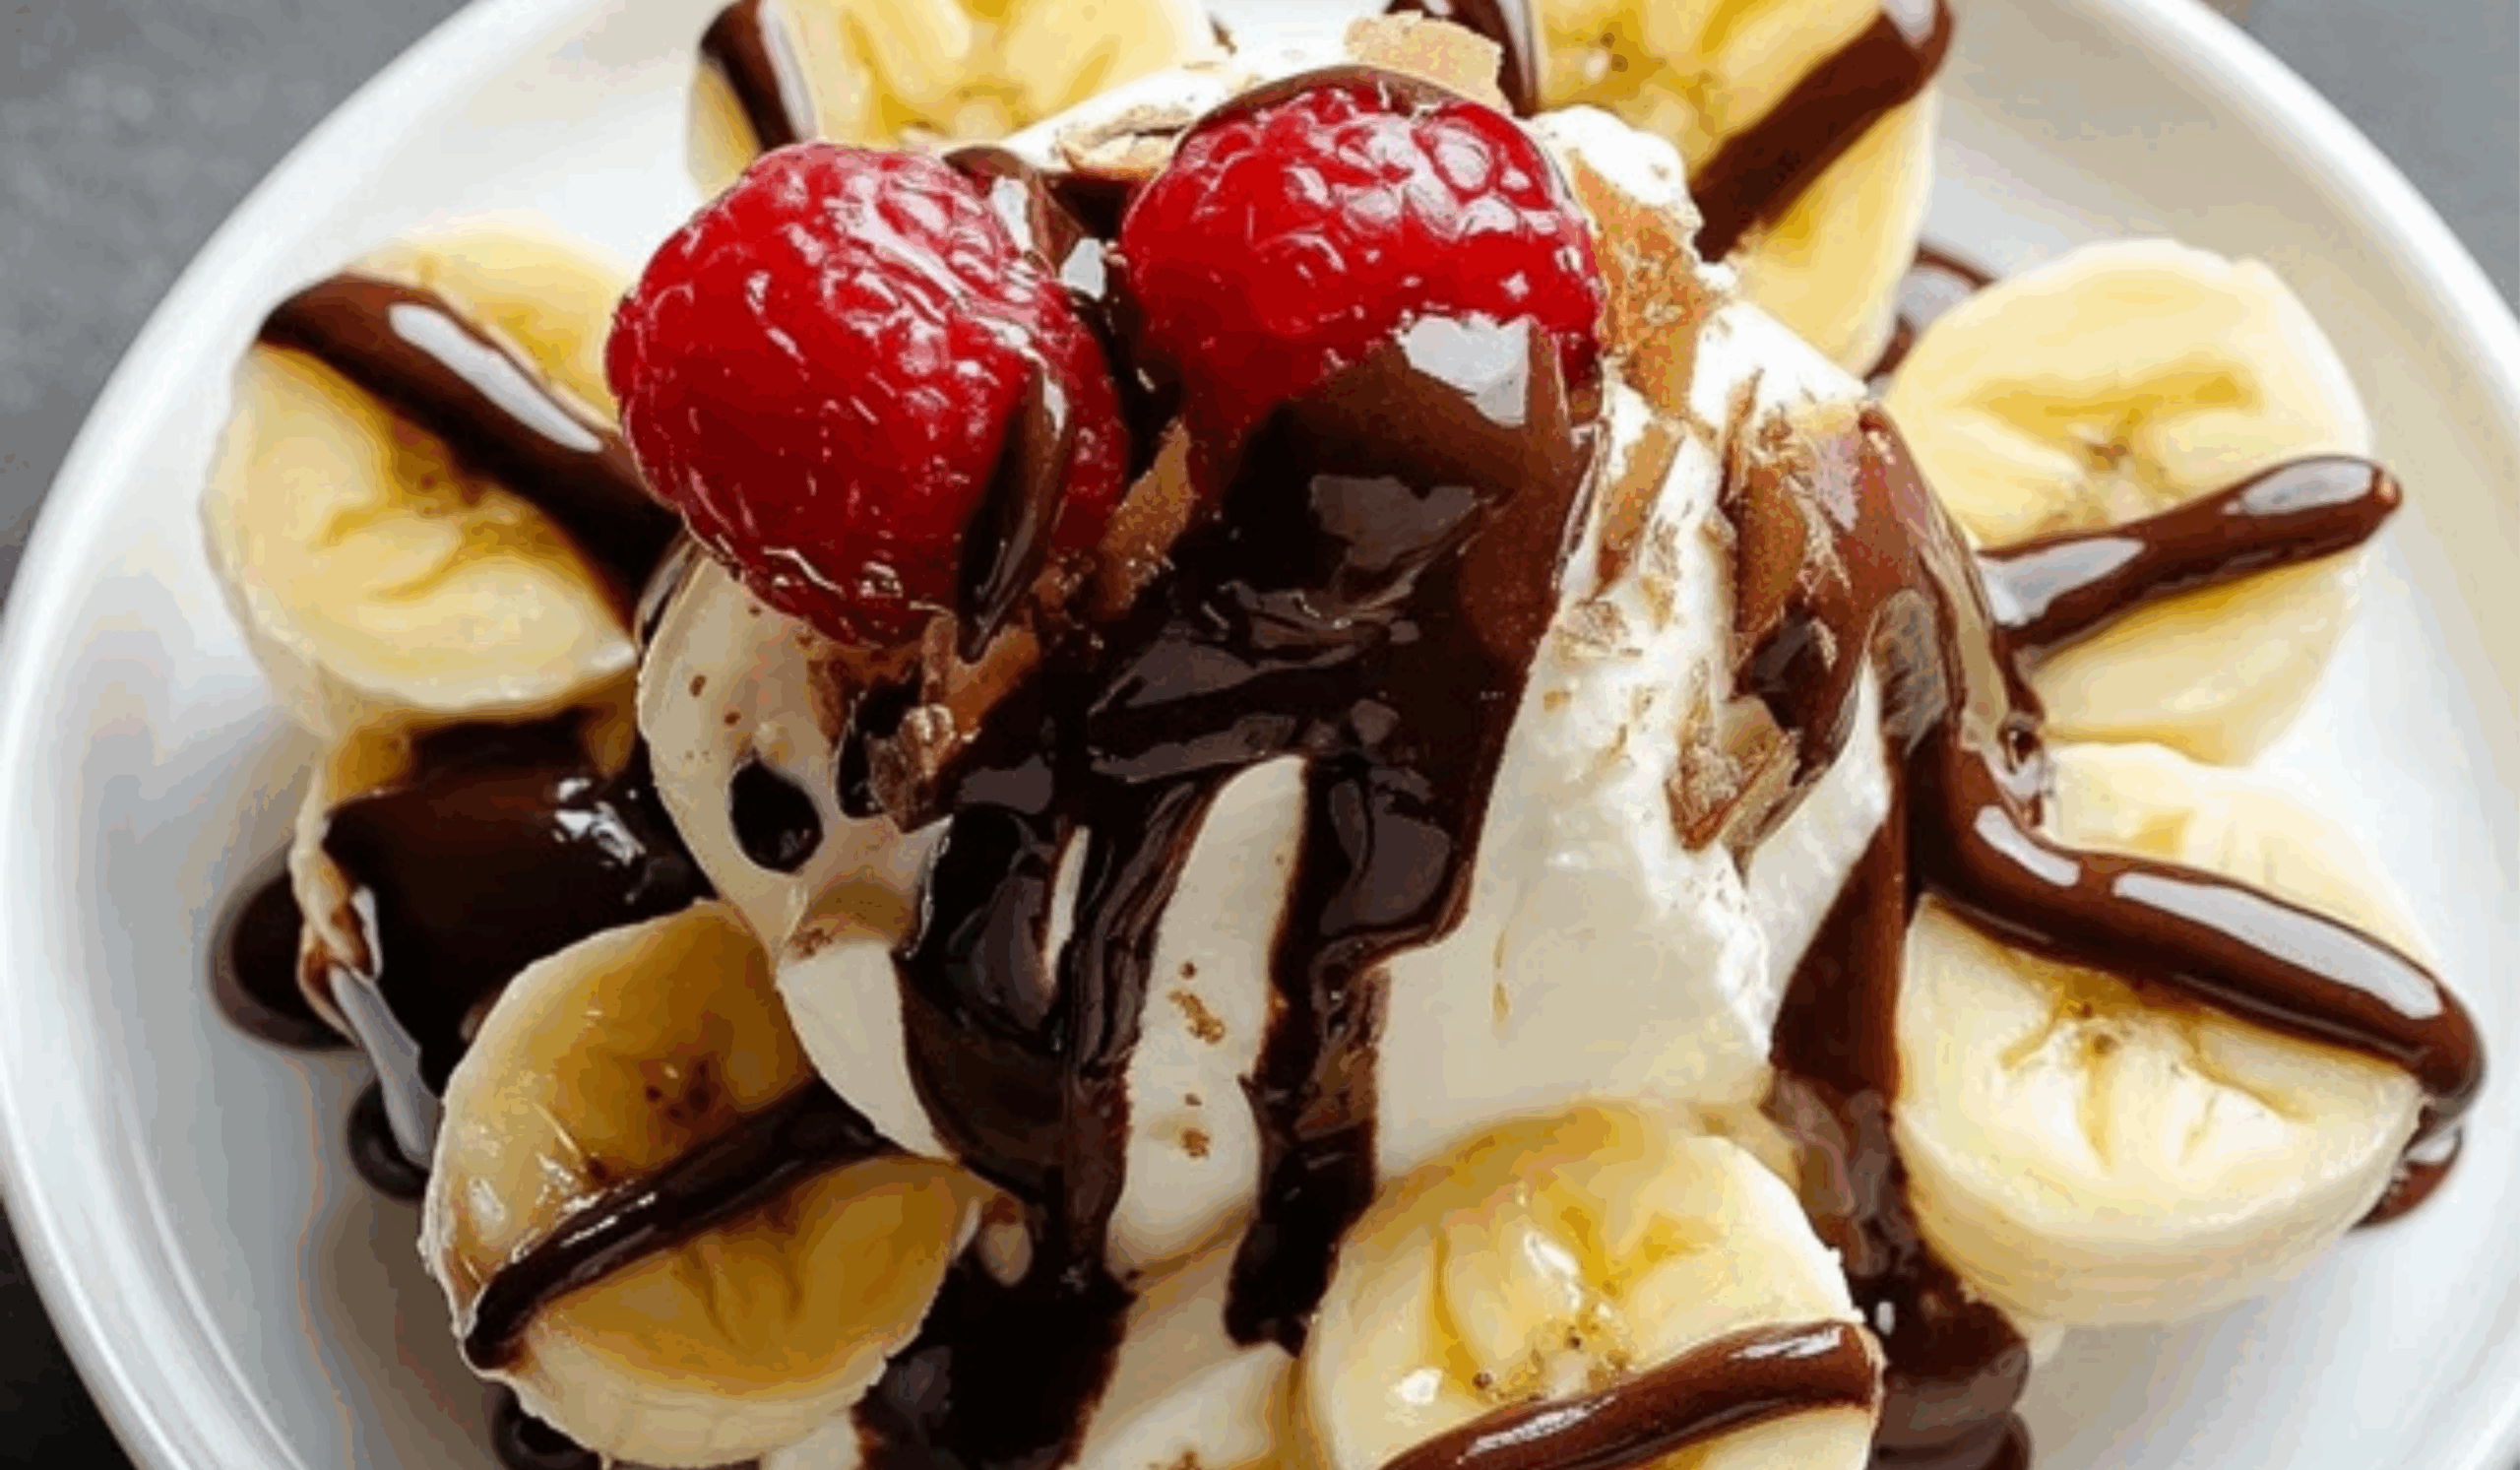
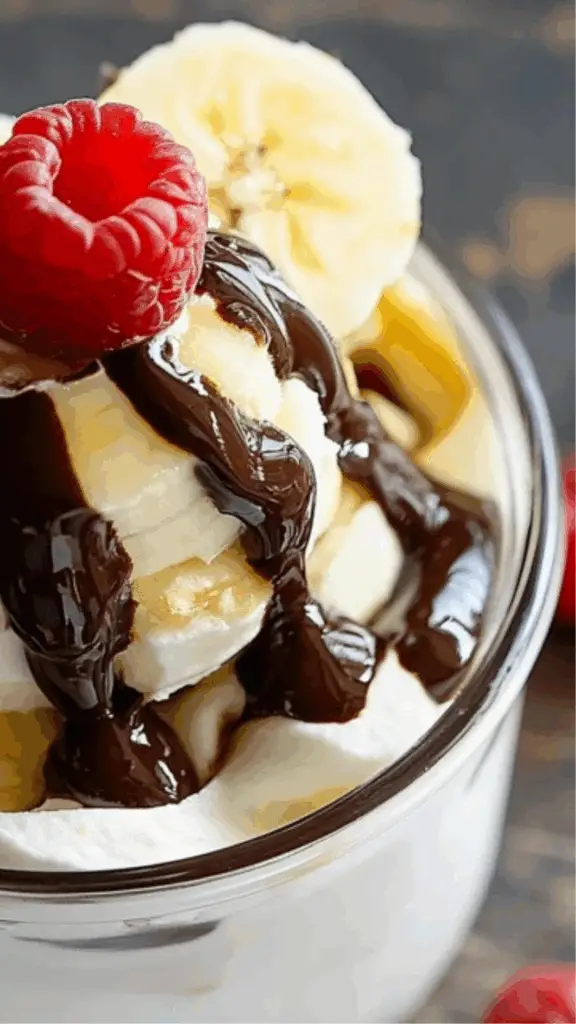
Step 3: Layer the Bananas
Slice the bananas evenly and arrange them over the cream cheese layer. Cover the entire surface to ensure each bite has a good banana flavor.
Beginner Note: Slice bananas just before using to minimize browning. A touch of lemon juice can also help preserve their color.
Step 4: Add Pineapple and Strawberries
Evenly sprinkle the drained crushed pineapple over the banana layer. Follow with a generous layer of sliced strawberries.
Beginner Note: Pat the pineapple dry with a paper towel to remove any extra moisture that could soften the crust too much.
Step 5: Drizzle and Garnish
Drizzle chocolate syrup evenly over the fruit. Sprinkle chopped walnuts (or your preferred nut) on top for crunch and flavor. Finally, add a few dollops of whipped topping and place maraschino cherries strategically for a classic banana split appearance.
Beginner Note: If you prefer, you can pipe the whipped topping using a zip-top bag with the corner snipped for a neater presentation.
Step 6: Chill Before Serving
Refrigerate the dessert for at least two hours before serving. This helps the layers to set properly and enhances the flavors.
Beginner Note: Cover the dish loosely with plastic wrap to avoid condensation dripping onto the dessert.
Notes
- Banana Freshness: Choose ripe but firm bananas. Overripe bananas can become mushy and affect the texture.
- Whipped Topping Alternatives: If you prefer homemade whipped cream, beat 1 cup heavy cream with 2 tablespoons powdered sugar until stiff peaks form.
- Ingredient Flexibility: Feel free to substitute the strawberries with raspberries or the pineapple with peaches or mango, depending on seasonal availability.
- No Mixer? No Problem: A sturdy whisk and some patience can substitute for a hand mixer if needed when combining cream cheese and sugar.
- Nut-Free Option: Omit nuts altogether if you’re serving guests with allergies.
- Make-Ahead Tip: This dessert can be made up to a day in advance and stored covered in the refrigerator.
- Prep Time: 20 minutes
This Banana Split Dessert is ideal for beginners. It requires no baking, minimal kitchen equipment, and no advanced techniques. It is quick to assemble, visually striking, and deliciously refreshing. Plus, it incorporates fresh fruits and can be easily adapted to fit dietary preferences. Whether you are cooking for a family gathering, a casual weekend treat, or a special event, this recipe delivers a rewarding experience without the stress.
Ingredients and Preparation
Here’s everything you will need to make this beautiful dessert.
Ingredients
- 2 cups graham cracker crumbs (or digestive biscuit crumbs as an alternative)
- 1/2 cup unsalted butter, melted
- 1 cup cream cheese, softened
- 1 cup powdered sugar
- 1 and 1/2 cups whipped topping (such as whipped cream or non-dairy alternative)
- 4 ripe bananas
- 1 can (20 ounces) crushed pineapple, drained
- 2 cups strawberries, sliced (or substitute with raspberries if preferred)
- 1 cup chopped fresh or canned peaches (optional alternative to pineapple)
- 1/2 cup chocolate syrup
- 1/4 cup chopped walnuts (optional, or substitute with almonds or pecans)
- Additional whipped topping for garnish
- Maraschino cherries for topping
Preparation
Before you begin, ensure your cream cheese is softened to room temperature for easier mixing. Prepare a 9×13-inch dish by lightly greasing it or lining it with parchment paper for easy removal. Drain the canned pineapple thoroughly to prevent excess moisture from making the dessert soggy.
Step-by-Step Instructions
Step 1: Make the Crust
In a medium bowl, combine the graham cracker crumbs and melted butter. Mix until the crumbs are fully moistened. Press the mixture firmly into the bottom of the prepared dish to form an even crust layer. Chill in the refrigerator for about 10 minutes to set while you prepare the next layers.
Beginner Note: Press firmly but gently; a flat-bottomed glass can help you create an even, compact crust without cracks.
Step 2: Prepare the Cream Cheese Layer
In a large bowl, beat the softened cream cheese and powdered sugar together until smooth and creamy. Fold in the whipped topping gently to maintain a light texture. Spread this mixture evenly over the chilled crust.
Beginner Note: Use slow, sweeping motions when folding whipped topping into the cream cheese to keep it airy and prevent deflating the mix.
Step 3: Layer the Bananas
Slice the bananas evenly and arrange them over the cream cheese layer. Cover the entire surface to ensure each bite has a good banana flavor.
Beginner Note: Slice bananas just before using to minimize browning. A touch of lemon juice can also help preserve their color.
Step 4: Add Pineapple and Strawberries
Evenly sprinkle the drained crushed pineapple over the banana layer. Follow with a generous layer of sliced strawberries.
Beginner Note: Pat the pineapple dry with a paper towel to remove any extra moisture that could soften the crust too much.
Step 5: Drizzle and Garnish
Drizzle chocolate syrup evenly over the fruit. Sprinkle chopped walnuts (or your preferred nut) on top for crunch and flavor. Finally, add a few dollops of whipped topping and place maraschino cherries strategically for a classic banana split appearance.
Beginner Note: If you prefer, you can pipe the whipped topping using a zip-top bag with the corner snipped for a neater presentation.
Step 6: Chill Before Serving
Refrigerate the dessert for at least two hours before serving. This helps the layers to set properly and enhances the flavors.
Beginner Note: Cover the dish loosely with plastic wrap to avoid condensation dripping onto the dessert.
Beginner Tips and Notes
- Banana Freshness: Choose ripe but firm bananas. Overripe bananas can become mushy and affect the texture.
- Whipped Topping Alternatives: If you prefer homemade whipped cream, beat 1 cup heavy cream with 2 tablespoons powdered sugar until stiff peaks form.
- Ingredient Flexibility: Feel free to substitute the strawberries with raspberries or the pineapple with peaches or mango, depending on seasonal availability.
- No Mixer? No Problem: A sturdy whisk and some patience can substitute for a hand mixer if needed when combining cream cheese and sugar.
- Nut-Free Option: Omit nuts altogether if you’re serving guests with allergies.
- Make-Ahead Tip: This dessert can be made up to a day in advance and stored covered in the refrigerator.
Serving Suggestions
While the Banana Split Dessert stands beautifully on its own, a few complementary touches can elevate your presentation:
- Side Suggestions: Serve with a scoop of vanilla or chocolate ice cream for a true banana split experience.
- Sauce Pairings: Offer additional chocolate syrup, caramel sauce, or strawberry sauce on the side for guests to customize their servings.
- Storage Tips: Store leftovers covered in the refrigerator for up to two days. The bananas may begin to brown slightly after that, although the dessert will still taste delicious.
Engagement Features
If you are new to the kitchen, this Banana Split Dessert is a fantastic first triumph. It is colorful, full of fresh fruit, and sure to impress anyone who tries it. I encourage you to give it a try and make it your own. Maybe you’ll discover a favorite variation by adding different fruits or sauces.
Once you make it, I would love to hear how it turned out for you. Did you add your own twist? Was it a hit at your gathering? Share your experiences and any questions in the comments below. Your feedback and creativity are welcome here. Let’s keep learning and growing in the kitchen together.