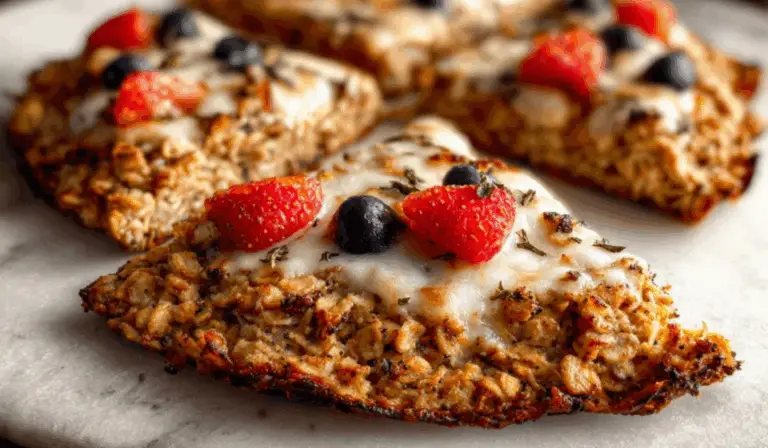
Ingredients
For the crust:
-
1 cup gluten-free rolled oats (use certified gluten-free oats if needed)
-
1 ripe banana, mashed
-
1 teaspoon baking soda
-
1 tablespoon maple syrup (or agave syrup)
-
1–2 teaspoons nut butter (such as almond, peanut, or sunflower seed butter for nut-free version)
-
Optional: 1 tablespoon plant-based vanilla protein powder (for extra nutrition and flavor)
-
Optional pinch of cinnamon or nutmeg for subtle spice
For the toppings (choose your favorites):
-
½ cup coconut yogurt or any non-dairy yogurt
-
½ cup sliced fresh fruits (strawberries, blueberries, banana, mango, kiwi, etc.)
-
2 tablespoons granola
-
1 tablespoon unsweetened coconut flakes
-
1 tablespoon dairy-free chocolate chips or cacao nibs
-
1 tablespoon nut butter drizzle
Preparation Notes:
-
Use overripe bananas for better sweetness and binding.
-
Rolled oats work best; avoid instant oats for texture reasons.
-
Protein powder adds bulk and taste but can be skipped if desired.
-
Use parchment paper or a silicone mat to prevent sticking when baking the crust.
Instructions
Step 1: Preheat your oven
-
Preheat oven to 350°F (175°C).
-
Prepare a baking sheet by lining it with parchment paper or a silicone baking mat. This helps ensure your crust doesn’t stick and bakes evenly.
Step 2: Mix your crust ingredients
-
In a medium mixing bowl, mash the banana with a fork until smooth.
-
Add the oats, baking soda, maple syrup, nut butter, and optional protein powder.
-
Stir together until a sticky dough forms. It should be thick and moldable but not runny. If it feels too dry, add a splash of non-dairy milk; if too wet, add a tablespoon more oats.
Step 3: Shape the crust
-
Spoon the dough onto the lined baking sheet.
-
Use your hands or the back of a spoon to press it into a round pizza shape, about 6–8 inches in diameter and ¼ inch thick.
-
Try to keep it even so it bakes uniformly.
Step 4: Bake the crust
-
Place in the preheated oven and bake for 18–20 minutes.
-
You’re looking for a golden brown color and firm texture on the surface.
-
The center should be cooked through but still slightly soft.
Step 5: Cool the crust
-
Remove from the oven and let cool on the pan for at least 5 minutes.
-
This allows it to firm up more, making it easier to add toppings without breaking.
Step 6: Decorate with toppings
-
Once cooled slightly, spread the coconut yogurt evenly across the crust.
-
Add your favorite fruits in a visually pleasing pattern.
-
Sprinkle granola and coconut flakes on top for crunch.
-
Add chocolate chips or cacao nibs for a hint of sweetness and texture.
-
Finish with a drizzle of nut butter if desired.
Step 7: Slice and serve
-
Slice into wedges just like a pizza.
-
Serve immediately for best texture, or refrigerate and enjoy later.
Notes
-
Banana substitute: If you don’t like bananas, try using unsweetened applesauce (about ½ cup) as an alternative. It will change the flavor slightly but still act as a good binder.
-
Make it nut-free: Use sunflower seed butter or tahini instead of almond or peanut butter.
-
Add protein: Plant-based protein powder not only boosts nutrition but also helps the crust hold together. Vanilla or unflavored work best.
-
For crunch: Don’t skip the granola on top—it brings texture and contrast to the creamy yogurt.
-
Want it warm? You can lightly warm the entire finished pizza in the oven for 5 minutes at low temperature to serve it warm with melty toppings.
-
Storing leftovers: This breakfast pizza is best enjoyed fresh, but leftovers can be stored in the fridge for up to 2 days. For best results, store toppings and crust separately and assemble just before eating.
-
Serving children: Cut into mini slices or bite-sized squares for toddlers and kids. Let them help decorate to make breakfast more fun.
- Prep Time: 10 minutes
- Cook Time: 20 minutes