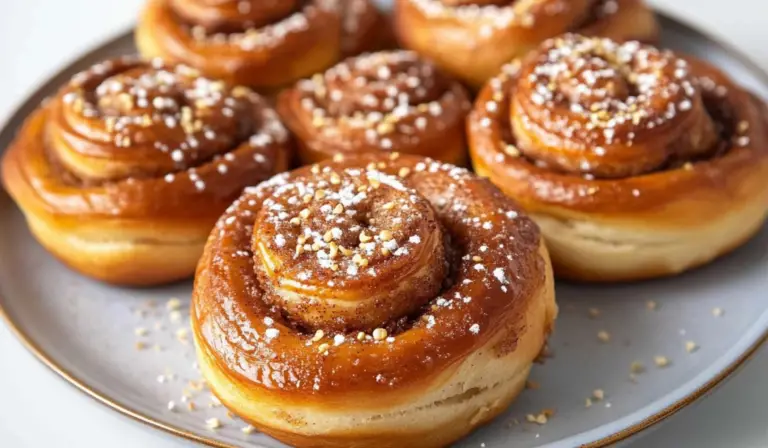
Ingredients
Scale
For the Dough
- 1 ½ teaspoons active dry yeast
- 1 cup warm milk
- 3 cups (450g) all-purpose flour
- ¼ cup sugar
- 1 teaspoon ground cardamom
- ½ teaspoon salt
- 4 tablespoons (75g) unsalted butter, softened
For the Filling
- 5 tablespoons (100g) unsalted butter, softened
- ¼ cup white sugar
- 3 tablespoons brown sugar
- 1 tablespoon cinnamon powder
For Finishing
- 1 beaten egg (for brushing)
- 2 tablespoons pearl sugar (for sprinkling)
Instructions
Step 1: Preparing the Dough
- Warm the milk slightly—it should be lukewarm but not hot (about 110°F or 45°C). Stir in the yeast and let it sit for about 5–10 minutes until it becomes foamy. This indicates that the yeast is active.
- In a large mixing bowl or the bowl of a stand mixer, combine flour, sugar, salt, and ground cardamom.
- Add the foamy yeast mixture and softened butter to the bowl. Mix with a paddle attachment until the dough starts to form.
- Switch to the dough hook attachment and knead for about 8–10 minutes, or until the dough is smooth and elastic. If kneading by hand, this will take about 12–15 minutes.
- Shape the dough into a ball, place it in a lightly oiled bowl, cover with a clean kitchen towel, and let it rest for 20 minutes.
Step 2: Preparing the Filling
- In a small bowl, mix the softened butter, cinnamon powder, white sugar, and brown sugar until well combined. This will create a spreadable, aromatic filling.
Step 3: Shaping the Cinnamon Buns
- Lightly flour a clean surface and roll out the dough into a rectangle about 45 x 35 cm (18 x 14 inches).
- Spread the cinnamon filling evenly over the dough, leaving about half an inch on the long edges without filling.
- Roll the dough from the long side to form a log, making sure it’s not too tight.
- Using a sharp knife or dough cutter, slice the log into 15 equal pieces, about 3 cm (1.2 inches) thick.
- Arrange the rolls on a baking tray lined with parchment paper, leaving space between them to expand.
- Cover with a kitchen towel and let them proof for 90 minutes or until they become slightly puffy.
Step 4: Baking the Kanelbullar
- Preheat the oven to 375°F (200°C) about 20 minutes before the buns finish proofing.
- Brush each bun with the beaten egg and sprinkle with pearl sugar.
- Bake in the middle rack of the oven for 17–20 minutes, or until the buns turn a deep golden brown.
- Let them cool on the baking sheet for at least 5 minutes before serving.
Notes
1. Proofing Time Matters
- The first rest period should not exceed 20 minutes. If the dough rests too long, it may over-proof and result in a less fluffy texture.
- After shaping the rolls, they don’t need to double in size. A slight puffiness is a good indicator they are ready to bake.
2. Ensuring a Soft and Fluffy Texture
- Spraying a bit of water into the oven after five minutes of baking helps create steam, which results in softer buns.
- Don’t roll the dough too tightly, as this can make the buns too dense.
3. Adjusting for Different Environments
- If your kitchen is cold, place the dough in a slightly warm oven (turned off) to encourage rising.
- If it’s too hot, proof the dough in a cooler area to prevent over-proofing.
4. Kneading Without a Stand Mixer
- If you don’t have a stand mixer, knead the dough by hand. It will take longer, but the dough is easy to work with.
- Use the “windowpane test” to check if the dough is ready—stretch a small piece between your fingers; if it forms a thin, translucent membrane without breaking, it’s properly kneaded.
- Prep Time: 40 minutes
- Cook Time: 20 minutes