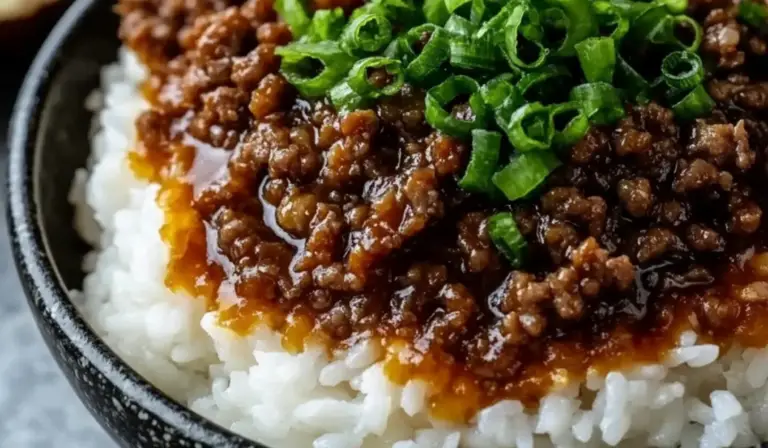
Ingredients
- 1 pound ground beef (or ground chicken for a leaner option)
- 1 tablespoon olive oil
- 2 cloves garlic, minced
- 1 tablespoon fresh ginger, grated
- ¼ cup soy sauce
- 2 tablespoons brown sugar
- 1 tablespoon sesame oil
- ½ teaspoon crushed red pepper flakes (optional for spice)
- 1 teaspoon rice vinegar
- 2 green onions, chopped (for garnish)
- 2 large eggs (fried, for topping)
- 2 cups cooked rice (white or brown)
Instructions
Step 1: Cook the Ground Beef
Heat a large skillet over medium heat and add the olive oil. Once the oil is warm, add the ground beef. Use a spoon or spatula to break the meat into smaller pieces as it cooks. Stir occasionally and cook for about 5 to 7 minutes, or until the beef is fully browned and no pink remains. If using ground chicken, cook until it is no longer pink and starts to turn golden brown.
Step 2: Add Garlic and Ginger
Once the meat is fully cooked, add the minced garlic and grated ginger. Stir well to combine and let them cook for about one minute, or until fragrant. Be careful not to burn the garlic, as it can turn bitter if overcooked.
Step 3: Prepare the Sauce
Pour in the soy sauce, brown sugar, sesame oil, and crushed red pepper flakes (if using). Stir everything together and allow the mixture to simmer for 2 to 3 minutes. The sauce should start to thicken slightly as the flavors meld together. Add the rice vinegar and mix well.
Step 4: Cook the Rice and Eggs
While the beef is simmering, prepare the rice according to package instructions if you haven’t already. In a separate pan, heat a little oil over medium heat and fry the eggs until the whites are set but the yolks are still slightly runny. If you prefer a fully cooked yolk, leave the eggs in the pan for an extra minute.
Step 5: Assemble the Bowls
Divide the cooked rice into serving bowls. Spoon the Korean ground beef mixture over the rice, making sure to distribute it evenly. Place a fried egg on top of each bowl and garnish with chopped green onions.
Step 6: Serve and Enjoy
The dish is best served immediately while still hot. You can enjoy it as is or add extra toppings for more flavor.
Notes
Common Mistakes to Avoid
- Overcooking the garlic and ginger: They cook quickly and can burn easily. Stir them constantly and only cook for about a minute.
- Using too much soy sauce: This can make the dish overly salty. Start with the recommended amount and adjust to taste.
- Not breaking up the ground meat: Large chunks of meat can make the dish less enjoyable. Use a spatula or wooden spoon to break it up into small pieces as it cooks.
- Cooking at too high a heat: Medium heat is best to avoid burning the garlic or drying out the beef.
How to Save Time
- Pre-chop ingredients: Having everything ready before you start cooking makes the process much faster.
- Use pre-minced garlic and ginger: While fresh ingredients provide the best flavor, using pre-prepared options can save time.
- Make extra for leftovers: This dish reheats well, so consider making a double batch to have meals ready for the next day.
How to Store and Reheat
- Refrigeration: Store leftovers in an airtight container in the fridge for up to three days.
- Freezing: The beef mixture can be frozen in a sealed container for up to two months. Reheat in a skillet or microwave before serving.
- Reheating Tips: Add a splash of water or broth when reheating to keep the beef moist. Heat over medium-low heat on the stove or in short bursts in the microwave.
- Prep Time: 10 minutes
- Cook Time: 15 minutes