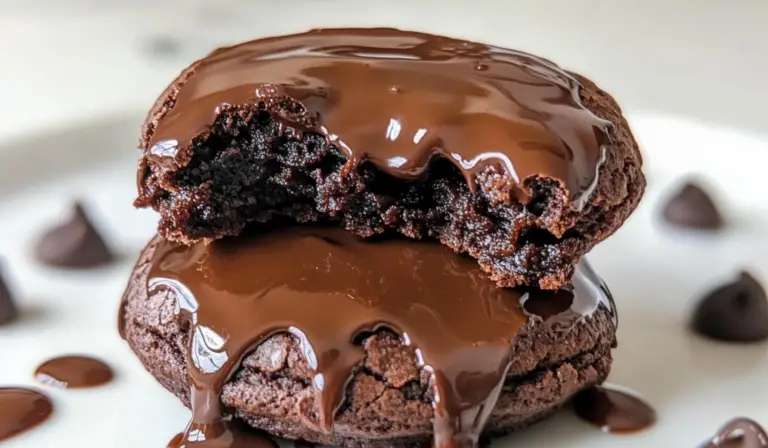
Ingredients
For the Cookie Dough
- 1 cup (170g) semisweet chocolate chips
- 1/2 cup (115g) unsalted butter
- 3/4 cup (150g) granulated sugar
- 2 large eggs
- 1 teaspoon vanilla extract
- 3/4 cup (95g) all-purpose flour
- 1/4 teaspoon baking powder
- 1/4 teaspoon salt
- 1/4 cup (25g) unsweetened cocoa powder
For the Lava Center
- 12 pieces chocolate truffles or dark chocolate squares
Instructions
1. Melt the Chocolate and Butter 🍫🧈
Start by melting the semisweet chocolate chips and unsalted butter together in a microwave-safe bowl. Microwave in 20-30 second intervals, stirring in between, until the chocolate and butter are fully melted and smooth. This process should only take about 1-2 minutes in total. Once melted, set the mixture aside to cool slightly. You don’t want it to be too hot when you add it to the eggs, or it may scramble them.
2. Mix the Wet Ingredients 🥄
In a separate large bowl, whisk together the granulated sugar, eggs, and vanilla extract. You’ll want to whisk until the mixture is smooth and well-combined. This step ensures that the sugar and eggs are fully incorporated, helping the cookies achieve a smooth, even texture.
Once the sugar and eggs are combined, slowly pour the melted chocolate and butter mixture into the wet ingredients. Whisk until everything is well-mixed. The rich chocolate will blend seamlessly with the eggs and sugar, creating a decadent batter.
3. Combine the Dry Ingredients 🌾
In another bowl, sift together the flour, baking powder, salt, and cocoa powder. Sifting ensures that all the dry ingredients are evenly distributed, which is crucial for achieving the right texture. Once sifted, gradually fold the dry ingredients into the wet mixture using a spatula or spoon. You’ll want to mix until a thick, smooth dough forms. The dough should be somewhat sticky but not overly wet.
4. Chill the Dough ❄️
Cover the dough with plastic wrap and refrigerate for about 30 minutes. Chilling the dough helps to firm it up, making it easier to handle and form into cookie dough balls. If you skip this step, the dough may be too soft and difficult to work with, and the cookies may spread too much during baking.
5. Preheat the Oven 🔥
While the dough chills, preheat your oven to 350°F (175°C) and line a baking sheet with parchment paper. This will help the cookies bake evenly and prevent them from sticking to the pan.
6. Form the Cookies 🍪
Once the dough has chilled, scoop about 1 1/2 tablespoons of dough and flatten it slightly in your hand. Place a chocolate truffle or a piece of dark chocolate in the center, and then wrap the dough around the chocolate to fully encase it. Make sure the dough is sealed around the chocolate so it doesn’t leak out during baking. Roll the dough into a ball, making sure it’s compact and smooth on the outside.
7. Bake the Cookies 🍪
Place the cookie dough balls onto the prepared baking sheet, spacing them about 2 inches apart to give them room to spread. Bake the cookies in the preheated oven for 10-12 minutes. The edges should be set and slightly firm, while the centers will still appear soft and slightly undercooked. This is key to getting that gooey molten center when you bite into the cookie.
8. Cool and Enjoy 🍽️
Allow the cookies to cool on the baking sheet for 5 minutes before transferring them to a wire rack. This will give them a chance to firm up slightly while still retaining their gooey centers. Enjoy warm for the ultimate molten chocolate experience.
Notes
- Extra Gooey Centers: For an even more indulgent experience, microwave the cookies for 10-15 seconds before eating to ensure the molten center stays extra gooey.
- Use Different Chocolates: Experiment with different types of chocolate for the filling. Try milk chocolate for a sweeter taste, or opt for white chocolate for a creamy twist. You can even use a combination of chocolates for a more complex flavor profile.
- Add Nuts: For a crunchy contrast to the soft, gooey center, you can fold in some chopped nuts such as walnuts, almonds, or hazelnuts into the dough. They’ll add texture and a nutty depth of flavor.
- Flavor Variations: Add a teaspoon of espresso powder to the dough to enhance the chocolate flavor. Or, incorporate a splash of orange extract for a citrusy twist that pairs wonderfully with chocolate.
- Serving Suggestions: These cookies are perfect on their own, but they also pair beautifully with a scoop of vanilla ice cream. The contrast of cold ice cream with the warm, gooey cookies is an unforgettable experience.
- Prep Time: 15 minutes
- Cook Time: 30 minutes